Attach bicycle trailer and coupling to e-bike
| Axle coupling: |
|
| Seatpost coupling: |
|
| Frame coupling: |
|
| Quick-release axle: |
|
| Thru-axle: |
|
Bicycle coupling and trailer: important notes before purchase
Before purchasing e-bike and bicycle trailer , there are some important notes to consider, so your child is safely on the road. First you should check the manufacturer's approval, since not all bikes are suitable for trailers .
Particularly carbon frames can break under the additional load. Therefore make sure that your bike offers the necessary stability for trailer transport.
Important:
Trailers must comply with the DIN standard EN 15918, to ensure safety standards like coupling stability and spoke protection .
Also pay attention to the weight limits of your e-bike and the bicycle trailer. Don't exceed either the maximum trailer load or the permissible total load of the bike, to ensure safety during the ride. Tip: When transporting a baby, the right baby insert in the bicycle trailer is crucial for your child's comfort during the ride. With a seat insert, an infant carrier or hammock , even newborns can be transported in the bicycle trailer.
Where is a bicycle trailer mounted on the e-bike?
In most cases the bicycle trailer is attached to the rear axle of the bike . There are various types of axles, which are presented in the following. After you have determined the axle type of your e-bike , you can then mount the matching bicycle trailer coupling.
Good to know: There are also other attachment points for the bicycle trailer that require other couplings. These are for example the seatpost coupling (attached under the saddle ) or frame coupling (mounted with drilled holes or at corresponding attachment points on the bike frame).
Bicycle trailer coupling: mounting depending on axle type
Each axle requires specific attachment methods for your bicycle trailer. The axle type determines which coupling is suitable and how it must be mounted.
The rear axle is particularly well suited for mounting a trailer, since thanks to its low center of gravity it offers high stability during the ride. Important: The bicycle trailer is always mounted on the left in the direction of travel. This ensures sufficient distance to the chain and the derailleur.
Bicycle trailer attachment with quick-release
The quick-release is a common type of attachment, which is particularly suitable for mounting bicycle trailers.
1. Open the quick-release:
Open the lever
to release the axle. The quick-release has two
small springs at the ends and an axle diameter of about 5 mm.
2. Mount the coupling:
Slide the
coupling adapter onto the axle and place the coupling at the
desired position. Tighten the screw bolts hand-tight to create a
stable connection.
3. Fix:
Close the lever until it sits tight. Make sure not to close it with force, so no damage occurs.
4. With insufficient threading:
If the thread
is too short, you can use a longer quick-release axle.
Remove the old axle and replace it. Make sure not to lose the springs
.
Attach bicycle trailer to thru-axle
1. Prepare mounting:
Check whether your thru-axle has the required diameter of at least 9 mm and a thread on one side.
2. Use adapter:
In many cases the
thru-axle requires an adapter to correctly mount the coupling.
Make sure the adapter is compatible with your e-bike.
3. Use torque wrench:
Mount the
coupling according to manufacturer specifications and tighten it with a
torque wrench. This ensures the correct tightening force
and stabilizes the mount.
4. Adjustment and fixation:
Make sure the coupling is correctly aligned and securely attached to ensure a smooth ride.

Attach bicycle trailer to full axle
1. Check the axle:
Make sure that enough
thread is available for the coupling (at least 15 mm). Full axles
are typically recognizable by cap nut attachments and cannot
be removed.
2. Use adapter:
If the thread is too short
, an adapter may be necessary, e.g. a 3.8 mm or 5 mm thick
axle adapter. This ensures that the coupling can be safely mounted
.
3. Ensure stability:
Make sure the coupling sits tight and check that no parts feel loose.
Attach bicycle trailer to e-bike: various coupling systems
When attaching a bicycle trailer to the e-bike, there are various options that depend on the axle and the e-bike model.
Axle coupling: connect bicycle trailer
The axle coupling is mounted directly to the rear-wheel axle or the frame of your e-bike. This system is ideal for child and cargo trailers, since it offers a particularly stable connection.
The axle coupling impresses with its fast mounting and its versatility for different trailer types. Particularly with frame locks and special coupling systems it is securely and easily attached in just a few steps.
Tip: Make sure the coupling system sits firmly and does not obstruct moving parts like brakes or spokes.
Seatpost coupling: practical with push handles
This coupling is attached under the saddle and is particularly suitable for bicycle trailers equipped with a push or pull handle. Ideal for lighter trailers or short routes.
Important: Don't maximize the payload, since the weight sits higher on the bike frame and the risk of tipping can be increased.
Frame coupling: attach bicycle trailer to the frame
Frame couplings are a popular choice when your e-bike already has drill holes or attachment points on the frame. They are often mounted on the chainstay.
Extended rear axle: when space gets tight
Some e-bikes with large batteries or special frame designs require an extended axle to securely attach the coupling. This is because the distance between the axle and the frame must be enlarged to create space for the coupling.
Here you can use adapters or special axle systems, that enlarge the required distance and enable a secure connection . Make sure the extended axle is compatible with your e-bike model, to ensure stability and safety during the ride.
This option is particularly recommended if you want to safely and reliably attach cargo trailers or heavily loaded child bicycle trailers to the e-bike .Hitching the bicycle trailer to the coupling
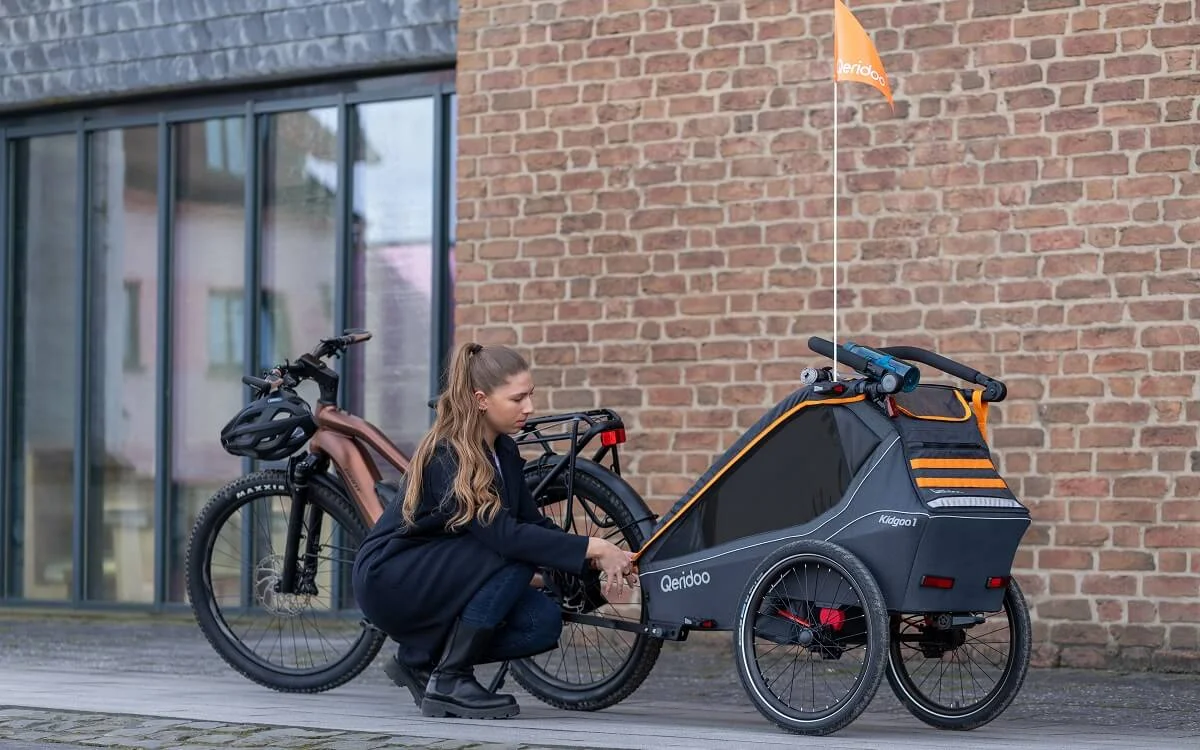
After the axle type has been determined and the matching coupling has been correctly mounted on the e-bike, the last step follows now: the safe hitching of the bicycle trailer. A careful connection ensures not just stability, but also maximum safety during the ride.
Here is a step-by-step guide for mounting the bicycle trailer:
1. Insert tow bar into the coupling:
Carefully insert
the trailer's tow bar into the coupling. Make
sure that it sits correctly, to ensure a safe connection between
trailer and bike.
2. Insert safety pin:
As soon as
the tow bar is in the coupling, insert the safety pin to
fix the tow bar. The pin prevents the tow bar from
unintentionally releasing during the ride.
3. Attach safety strap to the bike frame:
Attach
the safety strap to the bike frame to provide additional safety
. Make sure that the strap is not too loose, but also
not too tight. Too much tension could impair steering movements
, while a too-loose strap impairs stability.
4. Avoid contact with moving parts:
Make
sure that the safety strap and the tow bar don't touch any moving
parts like the disc brake. This could lead to problems with the
braking effect or steering.
With these simple steps you can ensure that your bicycle trailer is properly mounted and you can enjoy a safe ride .
Tip: A coupling rotation lock ensures that the coupling does not unintentionally rotate or release during the ride. It ensures a stable and secure attachment of the trailer to the e-bike, even on difficult cornering, higher speed or on uneven terrain.Last updated: February 4, 2026
Bicycle coupling and trailer: important notes before purchase
Before purchasing e-bike and bicycle trailer , there are some important notes to consider, so your child is safely on the road. First you should check the manufacturer's approval, since not all bikes are suitable for trailers .
Particularly carbon frames can break under the additional load. Therefore make sure that your bike offers the necessary stability for trailer transport.
Important:
Trailers must comply with the DIN standard EN 15918, to ensure safety standards like coupling stability and spoke protection .
Also pay attention to the weight limits of your e-bike and the bicycle trailer. Don't exceed either the maximum trailer load or the permissible total load of the bike, to ensure safety during the ride. Tip: When transporting a baby, the right baby insert in the bicycle trailer is crucial for your child's comfort during the ride. With a seat insert, an infant carrier or hammock , even newborns can be transported in the bicycle trailer.
Hitching the bicycle trailer to the coupling
After the axle type has been determined and the matching coupling has been correctly mounted on the e-bike, the last step follows now: the safe hitching of the bicycle trailer. A careful connection ensures not just stability, but also maximum safety during the ride.
Here is a step-by-step guide for mounting the bicycle trailer:
1. Insert tow bar into the coupling:
Carefully insert
the trailer's tow bar into the coupling. Make
sure that it sits correctly, to ensure a safe connection between
trailer and bike.
2. Insert safety pin:
As soon as
the tow bar is in the coupling, insert the safety pin to
fix the tow bar. The pin prevents the tow bar from
unintentionally releasing during the ride.
3. Attach safety strap to the bike frame:
Attach
the safety strap to the bike frame to provide additional safety
. Make sure that the strap is not too loose, but also
not too tight. Too much tension could impair steering movements
, while a too-loose strap impairs stability.
4. Avoid contact with moving parts:
Make
sure that the safety strap and the tow bar don't touch any moving
parts like the disc brake. This could lead to problems with the
braking effect or steering.
With these simple steps you can ensure that your bicycle trailer is properly mounted and you can enjoy a safe ride .
Tip: A coupling rotation lock ensures that the coupling does not unintentionally rotate or release during the ride. It ensures a stable and secure attachment of the trailer to the e-bike, even on difficult cornering, higher speed or on uneven terrain.Seatpost coupling: practical with push handles
This coupling is attached under the saddle and is particularly suitable for bicycle trailers equipped with a push or pull handle. Ideal for lighter trailers or short routes.
Important: Don't maximize the payload, since the weight sits higher on the bike frame and the risk of tipping can be increased.
FAQ – Die häufigsten Fragen zu Fahrradanhänger Kupplung und E-Bike
Das hängt vom Achsentyp des E-Bikes ab. Für Schnellspanner-Achsen (Quick-Release) gibt es spezifische Achskupplungen, die in wenigen Schritten montiert werden können. Für moderne E-Bikes mit Steckachsen wird häufig ein Adapter benötigt, der mit einem Drehmomentschlüssel befestigt wird. Bei älteren Modellen mit Vollachsen sind Polygonadapter oder spezielle Achsenadapter die richtige Wahl.
Zuerst den Spannhebel öffnen, um die Achse freizugeben. Dann den Kupplungsadapter auf die Achse schieben und an der gewünschten Position platzieren. Die Schraubbolzen handfest anziehen und den Spannhebel schließen, bis er stramm sitzt – nicht mit Gewalt schließen. Ist das Gewinde zu kurz, kann eine längere Schnellspannachse als Ersatz montiert werden.
Die Steckachse erfordert in den meisten Fällen einen kompatiblen Adapter – zum Beispiel den Qeridoo Steckachsadapter – sowie einen Drehmomentschlüssel für die korrekte Anzugskraft. Wichtig ist, dass der Adapter mit dem E-Bike-Modell kompatibel ist und die Kupplung nach der Montage korrekt ausgerichtet ist, um eine sichere und reibungslose Fahrt zu gewährleisten.
Ja, die Kupplung Fahrradanbindung für Fahrradständer kann an Rahmen mit einem KSA 18 Standard (18 mm Lochabstand) befestigt werden. Alternativ kann der Polygonadapter Giant M10 x 1,5 (KUFA-System) oder Giant-Adapter M10 x 1,5 (becco-System) an einer Anhängeraufnahme an Fahrrädern der Marken Giant, Liv und Momentum angebracht werden.
Diese Kupplungsarten bieten eine stabile Verbindung und sind besonders bei E-Bikes mit festen Montagepunkten geeignet. Bei empfindlichen Rahmenmaterialien wie Aluminium oder Carbon muss unbedingt auf Rahmenschonung geachtet werden.
Eine Kupplungsverdrehsicherung verhindert, dass sich die Kupplung während der Fahrt ungewollt verdreht oder löst – besonders bei Kurvenfahrten, höherem Tempo oder auf unebenem Terrain ein wichtiges Sicherheitselement. Sie empfiehlt sich für alle, die regelmäßig mit dem Fahrradanhänger unterwegs sind und maximale Verbindungssicherheit wünschen.
Zunächst sollte die Herstellerfreigabe des E-Bikes für den Anhängerbetrieb geprüft werden – nicht alle Räder sind dafür ausgelegt. Carbonrahmen können unter der zusätzlichen Belastung brechen und sind in der Regel nicht für Anhänger geeignet. Der Anhänger muss zudem der DIN-Norm EN 15918 entsprechen und die Gewichtsgrenzen des E-Bikes – sowohl Anhängelast als auch zulässige Gesamtbelastung – dürfen nicht überschritten werden.
Nach der Montage alle Schrauben und Befestigungspunkte auf festen Sitz überprüfen, sicherstellen, dass sich keine beweglichen Teile berühren und eine kurze Testfahrt auf ruhigem Gelände durchführen. Dabei auf ungewöhnliche Geräusche, Wackeln oder Einschränkungen der Lenkung achten. Vor jeder Ausfahrt sollte die Kupplung kurz auf Festigkeit und falls vorhanden der Sicherungssplint auf korrekten Sitz überprüft werden.
Eine Universalkupplung, oft auch Schnellspann-Kupplung genannt, ist mit vielen Fahrradtypen kompatibel. Beim Kauf solltest Du auf die Kompatibilität mit Deinem Achsentyp, ein TÜV- oder GS-Siegel sowie die ausdrückliche Freigabe für E-Bikes achten.
Mit Anhänger darf Dein E-Bike maximal 25 km/h fahren, die fahrende Person muss mindestens 16 Jahre alt sein, und der Anhänger sollte der DIN-Norm EN 15918 entsprechen. Zusätzlich gelten Gewichtsgrenzen sowie eine Pflicht zu Beleuchtung und Reflektoren.